
Published 30 Jul 2025
Article by
4 min read
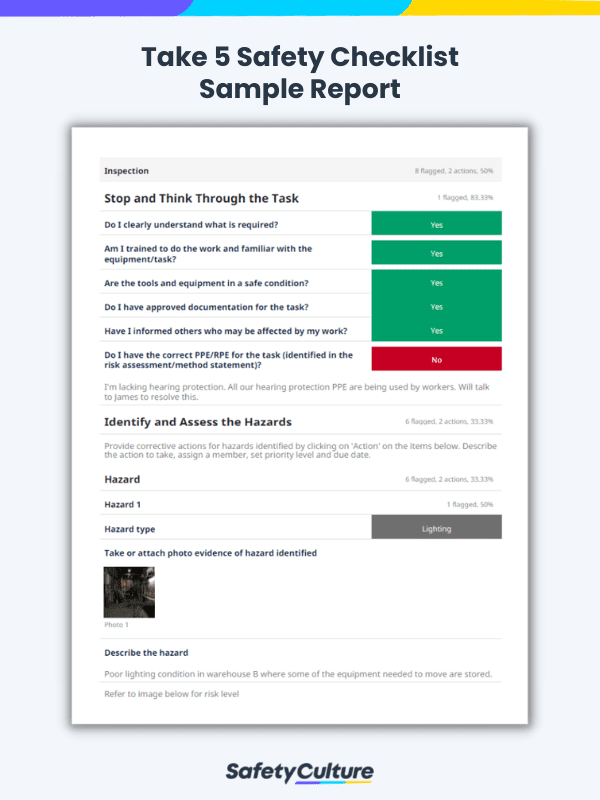
What is a Take 5 Safety Checklist?
A take 5 safety checklist is a tool used to identify health and safety hazards before starting work on a site. Performing health and safety checks using the take 5 procedure (Stop, Look, Assess, Control, and Monitor) helps workers and contractors mitigate exposure to hazards and health risks. The 5-minute safety inspection should take place to prevent any accidents, injuries, or near misses.
How to Complete a Take 5 for Safety Check
Conducting a take 5 safety check is a straightforward approach to help workers, contractors, and safety professionals ensure that the job to be done is safe to implement by proactively identifying the risks involved and their likelihood to happen.
Here are the 5 steps involved in the take 5 safety procedure, and some real-life examples of how each step can be undertaken.
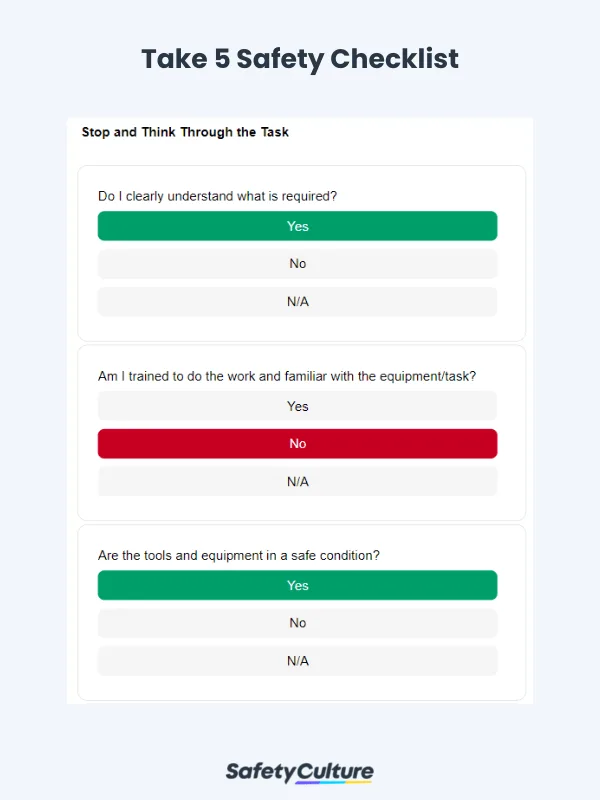
1. Stop and think about the potential dangers associated with the job.
Some questions that you can ask yourself during the inspection or a take 5 safety check are the following:
Do I clearly understand what is required?
Am I trained to do the work and familiar with the equipment/task?
Are the tools and equipment in a safe condition?
Do I have approved documentation for the task?
Have I informed others who may be affected by my work?
Do I have the correct Personal Protective Equipment (PPE) for the task (identified in the risk assessment/method statement)?

Sample Report for theStopsection
2. Look and identify any hazards.
Follow these steps when filling out this part of your take 5 safety checklist or template:
List the type of hazard you’ve identified.
Create corrective or preventive actions.
Take or attach photo evidence of the identified hazard.
Describe the hazard.
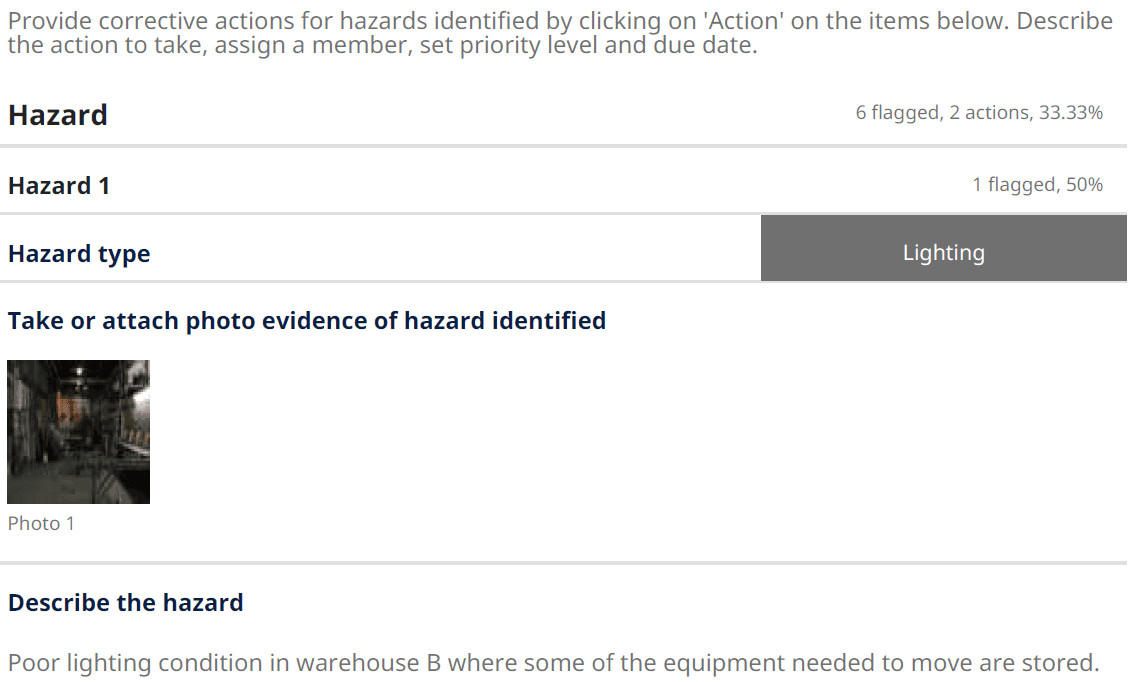
Sample Report for theLooksection
3. Assess the risk; consider any possible threats of damage or injury.
Now that you’ve identified the hazards, you must also assess the risks involved in such hazards. For this section of the template, you can do the following:
Set an action priority based on the hazard’s risk level (Extreme Risk, High Risk, Medium, or Low Risk).
Add notes for further instructions or actions.
Identify the hazard’s likelihood level (Rare, Unlikely, Possible, Likely, or Almost Certain).
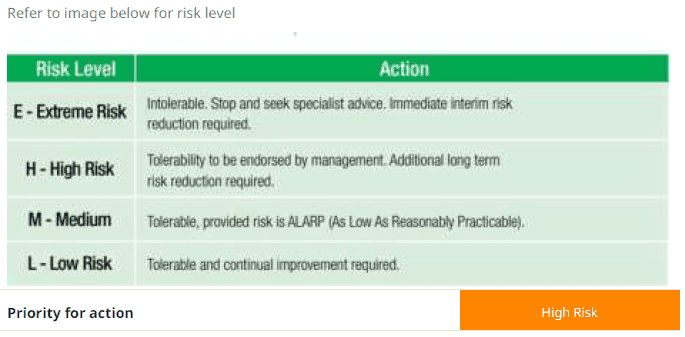
Sample Report for theAssesssection
4. Control hazards by implementing suitable control measures to reduce risk.
In this section, describe the most appropriate or recommended control measures that you or the respective team members/personnel should take. The description must be specific and assigned accordingly.
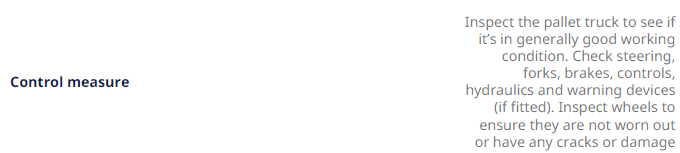
Sample Report for theControlsection
5. Monitor hazards to successfully mitigate the likelihood of injuries or damages.
Hazard identification is only the first step toward ensuring and improving safety on the job site. Hence, the continuous implementation of control measures and monitoring actions are a must. This section must be used to specify or summarize what kind of next steps should be taken.

Sample Report for theMonitorsection
What to Include in a Take 5 Safety Checklist
Take 5 Safety Checklist Sample Report | SafetyCulture
To guide you better in creating and using a take 5 safety checklist, here are the basic details and sections you must include:
Title Page – briefly discusses the task, location, and date of the conducted take 5 safety check
Stop Section – guide questions that tackle the potential dangers or hazards you may encounter during the task
Look Section – where hazards on the job site are identified.
Assess Section – where the hazards’ risk levels are analyzed and set
Control Section – recommended control measures to address risks and hazards
Monitor Section – established protocols for monitoring if control measures are implemented and effective
Completion – section for the worker and supervisor to sign off the take 5 safety check

Sydney Festival manages 60 venues, 150 events, 334 performances, and 900 artists using customized SafetyCulture templates for inductions, toolbox talks, pre-event checks, incident reporting, and daily reports, enhancing safety and operations across all sites.

Still looking for a checklist?
Search, filter, and customize 60,000+ templates across industries and use cases.