How Directional Boring May Be The Next Big Thing In Infrastructure Projects
If you need an underground utility installation, directional boring may be the right option for you.
Published 20 Aug 2024
Article by
4 min read
What is Directional Boring?
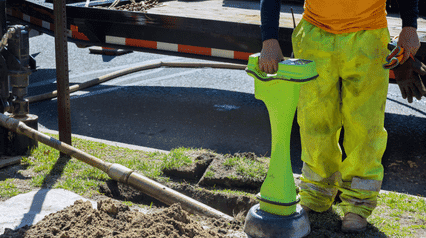
Directional boring, also known as Horizontal Directional Drilling or HDD, is a method of installing various types of underground utilities, such as pipelines and cables, without disturbing the surface above. It is often used in areas where excavating or trenching is not practical or possible, such as beneath roads, buildings, or other sensitive structures.
The process of directional boring begins with drilling a small pilot hole. This pilot hole is then enlarged to a size that is sufficient for the installation of the desired underground utility. Once the pilot hole has been enlarged, the direction of the bore is changed in order to reach the desired location.
Directional boring is a relatively new technology, but it has been growing in popularity in recent years due to its many advantages.
What are its Pros and Cons?
Directional boring is often used to install water and gas lines, sewer and storm drains, and even power and communications cables. There are many advantages to using the HDD method, but there are also some disadvantages to keep in mind.
Advantages
Directional boring has a number of advantages over traditional excavation and trenching methods. It is less disruptive to the surface, so it can be used in areas where traditional digging would not be possible, such as busy streets or fragile ecosystems. It is also less expensive and time-consuming than trenching and can be used to install multiple lines at once.
Streamline Your Construction Operations
Unlock the power of data-driven insights, standardized processes, and effective communication to improve efficiency and productivity across all jobsites.
Disadvantages
Directional boring also has some disadvantages. It is a more complex process than trenching, so it requires more training and experience to do it correctly. It also has a higher risk of damaging the underground infrastructure, which can be extensive and expensive to repair.
How Does Directional Boring Work?
There are several processes that need to be done when performing HDD operations. Some of these include:
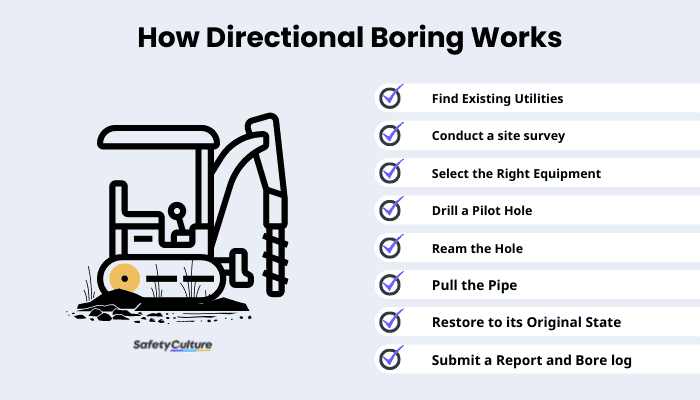
Directional Boring Process: How It Works
1. Find Existing Utilities
You need to know where all of the existing utilities are before you start to bore. This way, you can avoid them and not cause any damage.
2. Conduct a Site Survey
Once the utilities are located, the next step is to survey the site. Usually conducted by a boring foreman or project manager, a site survey helps determine the best route for the bore, taking into account such factors as terrain and underground obstructions.
3. Select the Right Equipment
After the survey is complete, the next step is select the equipment that will be used for the bore. This includes choosing the right drill, deciding on drilling fluid, and selecting reaming equipment.
4. Drill a Pilot Hole
After choosing the appropriate boring equipment, the pilot hole is drilled first using a smaller diameter drill bit. This helps establish a starting point and makes it easier to pull the larger drill through afterward.
5. Ream the Hole
Once the pilot hole is drilled, the reamer is pulled through to widen it out to the final size. This is usually done in several passes, gradually increasing the size of the reamer each time.
6. Pull the Pipe
Next, the pipe is pulled through the newly created hole. This pipe is usually made of High-Density Polyethylene (HDPE) and can be used for various purposes, such as carrying water, gas, or telecommunications cables.
7. Restore the Site to Its Original State
Once everything has been carried out, it’s time to do site cleanup and restoration. This process involves the removal of extraneous bore mud and spoils using a vacuum excavator. Meanwhile, surface features such as sod, asphalt, and curbing are restored to their initial condition.
8. Submit a Report and Bore Log
Finally, field personnel must submit a report which includes the details of the utilities installed and a bore log that indicates the depth and path information to the customer. A digital log template can simplify this documentation process for field operators.
Applications of Directional Drilling
Here are some of the most common applications for directional boring:
Installing drainage and sewer pipe systems
Drilling to avoid geological problems
Placing utility lines beneath sidewalks and streets
Installing cable television and telecommunications lines
Drilling for environmental remediation purposes
Drilling for oil and gas exploration
Constructing Tunnel Boring Machines (TBMs)
Implement Successful Directional Boring with SafetyCulture
Why SafetyCulture?
Directional boring is an ideal solution for projects where trenching or excavating is not possible, such as crossing a river or roadway. HDD is a complex process that requires careful planning and execution to be successful.
SafetyCulture can help you plan and execute a successful directional boring project with various customizable checklists. This checklist covers all the key elements of HDD, from pre-job planning to post-job cleanup, and can be used on any project, big or small.
With SafetyCulture, you can:
Create or edit custom checklists for your HDD project, including reports and bore logs
Conduct pre-job site inspections to ensure workplace safety before operations begin
Monitor progress and track changes in real-time using the app’s analytics dashboard
Ensure post-job cleanup is complete through automated workflows and collaborative actions
Instantly capture and report problems encountered on-site through the Issues feature
FAQs about Directional Boring
Article by
SafetyCulture Content Team
SafetyCulture Content Contributor, SafetyCulture
View author profileRelated articles
Safety
Safety Management

10 Safety Moment Ideas and Topics to Use in Your Workplace
Explore 10 safety moments ideas and practical tips to help your team identify workplace hazards and build stronger safety habits every day.
Safety
Public Safety

A Guide to Disaster Preparedness Training
Check out this guide to disaster preparedness training, including its key objectives and different approaches.
Safety
Public Safety

Understanding Disability and Disaster Risk Preparedness
Learn about disability-inclusive approaches to disaster risk preparedness, why it’s important, and tips for creating a preparedness plan.