Published 1 Dec 2025
Article by
5 min read
What is an Excavator Inspection Checklist?
An excavator inspection checklist is a tool that outlines the parts to be examined on an excavator prior to its use. It often includes checks for structural, mechanical, hydraulic, and electrical components. This tool helps operators identify any defects and prioritize corrective actions to ensure the excavator’s safe operation and functionality.
Benefits of Using a Checklist for Excavator Inspections
Excavators are not only expensive, but they also pose a great hazard due to their weight and size. Given the risks associated with this equipment, excavator inspections are a crucial part of excavation safety.
Checklists are a useful guide in assessing the excavator’s condition before it’s used on the field. Below are the following benefits of using a digital excavator checklist for these checks:
Enhancing Safety
Safety is the top concern in excavation sites. A detailed excavator checklist can help operators detect and address safety hazards promptly.
Digital checklists, in particular, prove to be beneficial for instantly capturing data. If inspectors or operators see any issues such as a leak, they can simply take a photo or a video of it. Additionally, they can send a report of their findings to the maintenance team for a swift response.
Boosting Efficiency
An excavator checklist allows inspectors to conduct pre-operation checks faster because they have a clear roadmap of areas to assess. By eliminating the need for manually filling out forms, operators can have more time to do the actual excavation work more safely and efficiently.
Showing Commitment to Safety Regulations
The Occupational Safety and Health Administration (OSHA) requires pre-use inspections for all construction equipment, including excavators.
Using a digital inspection checklist facilitates compliance with these regulations. Operators can record all activities and findings in real time and generate reports as proof of completion. These documents are stored in the cloud, so they can easily retrieve them in times of audit.
What to Include in the Inspection Checklist
An excavator inspection sheet may vary depending on the scope of the inspection and the type of excavator. A basic excavator inspection checklist template should include at least the following items to ensure a comprehensive pre-use check:
Tracks or Wheels
Hydraulic System Engine
Bucket and Attachments
Cab
Safety Equipment
Undercarriage
Electrical System
Structural Integrity
How to Create a Digital Excavator Pre-start Checklist?
Minimize the risks of operating this huge piece of machinery by making an effective excavator inspection checklist. Here are the following steps:
Review any existing regulation or code of practice on the safe use of excavators in your local area. Use that as your guide and incorporate it into your excavator inspection checklist.
Familiarize yourself with the specific model of your excavator: its key components, functionalities, and common areas prone to wear and tear. You may also refer to the manufacturer’s guidelines to gain insights into the recommended inspections and required safety precautions.
Group the inspection items into logical categories based on critical components. From there, identify the specific inspection points.
Include images or videos to give inspectors or operators a visual reference to pinpoint the parts and what these should look like.
Test the effectiveness of your checklist and involve the key personnel to make sure all essential items are covered.
Once you implement the excavator inspection checklist, always remember that it’s not set in stone. You can modify and enhance it depending on any future circumstances.
How to Inspect Excavators Using a Checklist
While you may need to service an excavator every three months, you still have to conduct a daily pre-use inspection to spot issues, avoid accidents, and prevent further damage. Observe a systematic approach to your daily excavator inspection with the following steps:
1. Start with the Right Checklist
You’ve already won half the battle with the right checklist. This will guide you until the end of the inspection. It ensures that every critical aspect of the excavator is thoroughly examined.
Moreover, it helps inspectors avoid overlooking important components or steps in the inspection process. And if there’s any issue, your team can address it promptly before you even start the excavator’s engine.
2. Do a Visual Check
Once you have your checklist, use it as a guide when looking for visible signs of damage or wear on the critical components. Here are some key issues to look out for when doing this process:
Dents or cracks
Body or frame of the excavator
Loose or damaged components
Rollers
Idlers
Sprockets
Leaks
Hoses
Fittings
Cylinders
Loose or damaged wirings
Electrical system
Engine compartment
Damage or wear
Whole part of the Excavator
Consistent pre-use visual inspections can contribute to the optimal condition of the excavator. This way, you can address any damage before it gets worse. It also reduces the risk of accidents caused by any malfunction during operations.
3. Gauge the Fluids
Check the level of the engine oil, hydraulic fluid, coolant, and fuel. Gauge it with dipsticks or sight glasses and see if all fluid levels fall within the recommended range. Additionally, you should conduct thorough examinations for any indications of leaks around hoses, connections, or reservoirs.
4. Conduct Functional Check
This check includes the engine, hydraulic system, controls, and lights. Start the engine and listen for any irregular noises or vibrations. Then, engage the hydraulic controls and test the smoothness and responsiveness as you move the arm, bucket, and boom. Lastly, confirm if other electrical systems such as the lights and horns are working properly.
5. Inspect the Safety Features
Include the features that protect you in the inspection. Make sure that the seat belts and backup alarms are working and the mirrors are adjusted accordingly. Check the cab for any obstacles or potential hazards like debris on the floor or controls.
Most importantly, double-check if you can depend on emergency shut-off switches and other safety mechanisms. Make sure they’re ready to use when needed.
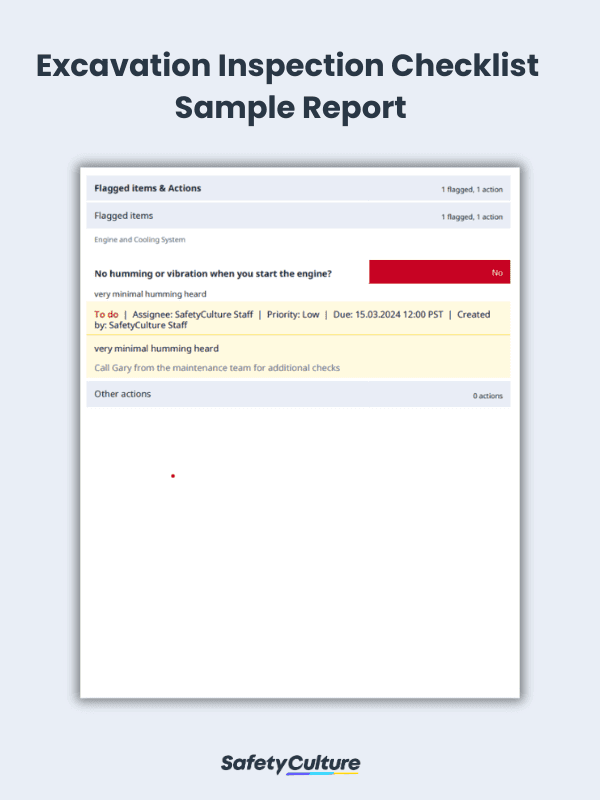
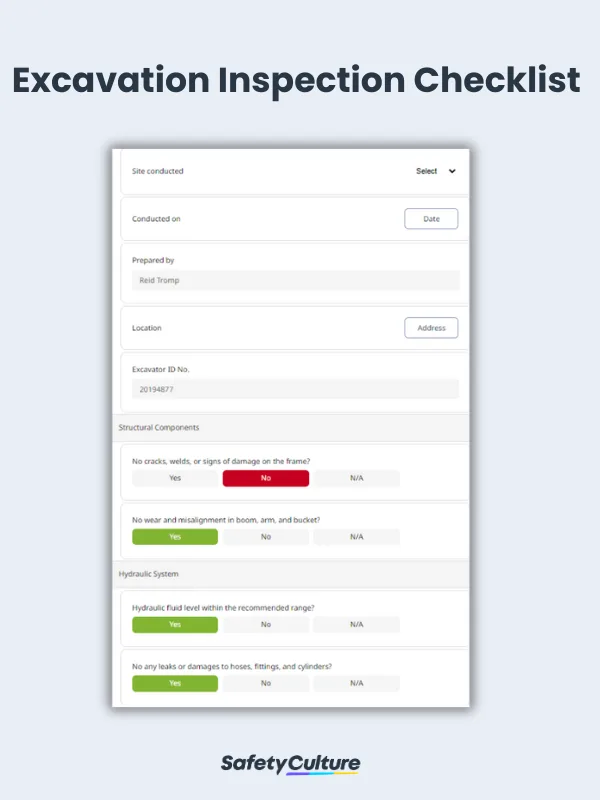
Excavator Inspection Checklist Sample

Excavation Inspection Checklist Sample Report | SafetyCulture


