What Does a Risk Prioritization Matrix Template Include?
Before you use a template, it's worth knowing exactly what you're working with. A well-structured risk prioritization matrix template includes the following fields:
Risk description — A clear, specific statement of the risk (not a category label)
Likelihood score — A 1–5 rating of how probable the risk is, given existing controls
Impact score — A 1–5 rating of how severe the consequences would be if the risk occurred
Risk rating — Calculated automatically as likelihood × impact (range: 1–25)
Priority level — Color-coded bands based on the rating: Low (1–5), Medium (6–12), High (13–19), Critical (20–25)
Risk owner — The person responsible for monitoring or acting on this risk
Recommended action — One of four treatment responses: avoid, reduce, transfer, or accept
The color-coded matrix grid sits alongside the list, as it gives stakeholders a visual read of the full risk landscape without having to interpret the numbers row by row. For teams managing risk analysis across multiple projects or sites, that visual layer is often the detail that turns a completed template into a useful briefing document.
How to Use the Risk Prioritization Matrix Template
Step 1: List all identified risks
The first thing the template asks is to describe and list all identified risks. It’s crucial to be as specific as possible to score the risks properly. For example, "Key supplier fails to deliver components within the project window" is a usable risk description.
Aim to capture at least 10–15 risks before scoring begins. Anything fewer tends to mean the team has stopped at the obvious ones. A thorough risk assessment beforehand gives you a list worth prioritizing.
Step 2: Fill in the likelihood and impact score fields
This template includes a 1–5 scale for both likelihood and impact. Use the reference labels built into the template — Rare through to Almost Certain for likelihood, and Negligible through to Catastrophic for impact — to guide your scoring. Enter a number in each field for every risk on your list.
Step 3: Review the calculated risk rating and priority band
The template makes it easier to visualize the calculation and impact scores to generate a risk rating, and maps that rating to a priority band: Low, Medium, High, or Critical. Review the results column and cross-check any ratings that don't align with your team's assessment, as it’s important to revisit and calibrate your scores before finalizing.
Step 4: Complete the owner and recommended action fields
For every risk rated Medium or above, assign corrective actions to the person responsible for monitoring or treating it. Provide additional comments or recommendations in the provided field and note any deadlines where required.
Step 5: Save, share, and schedule a review
Once complete with a sign-off, export the template as a PDF or share it digitally with relevant stakeholders. The template is designed to be a living document — save a dated version after each review cycle so you can track how your risk profile changes over time.
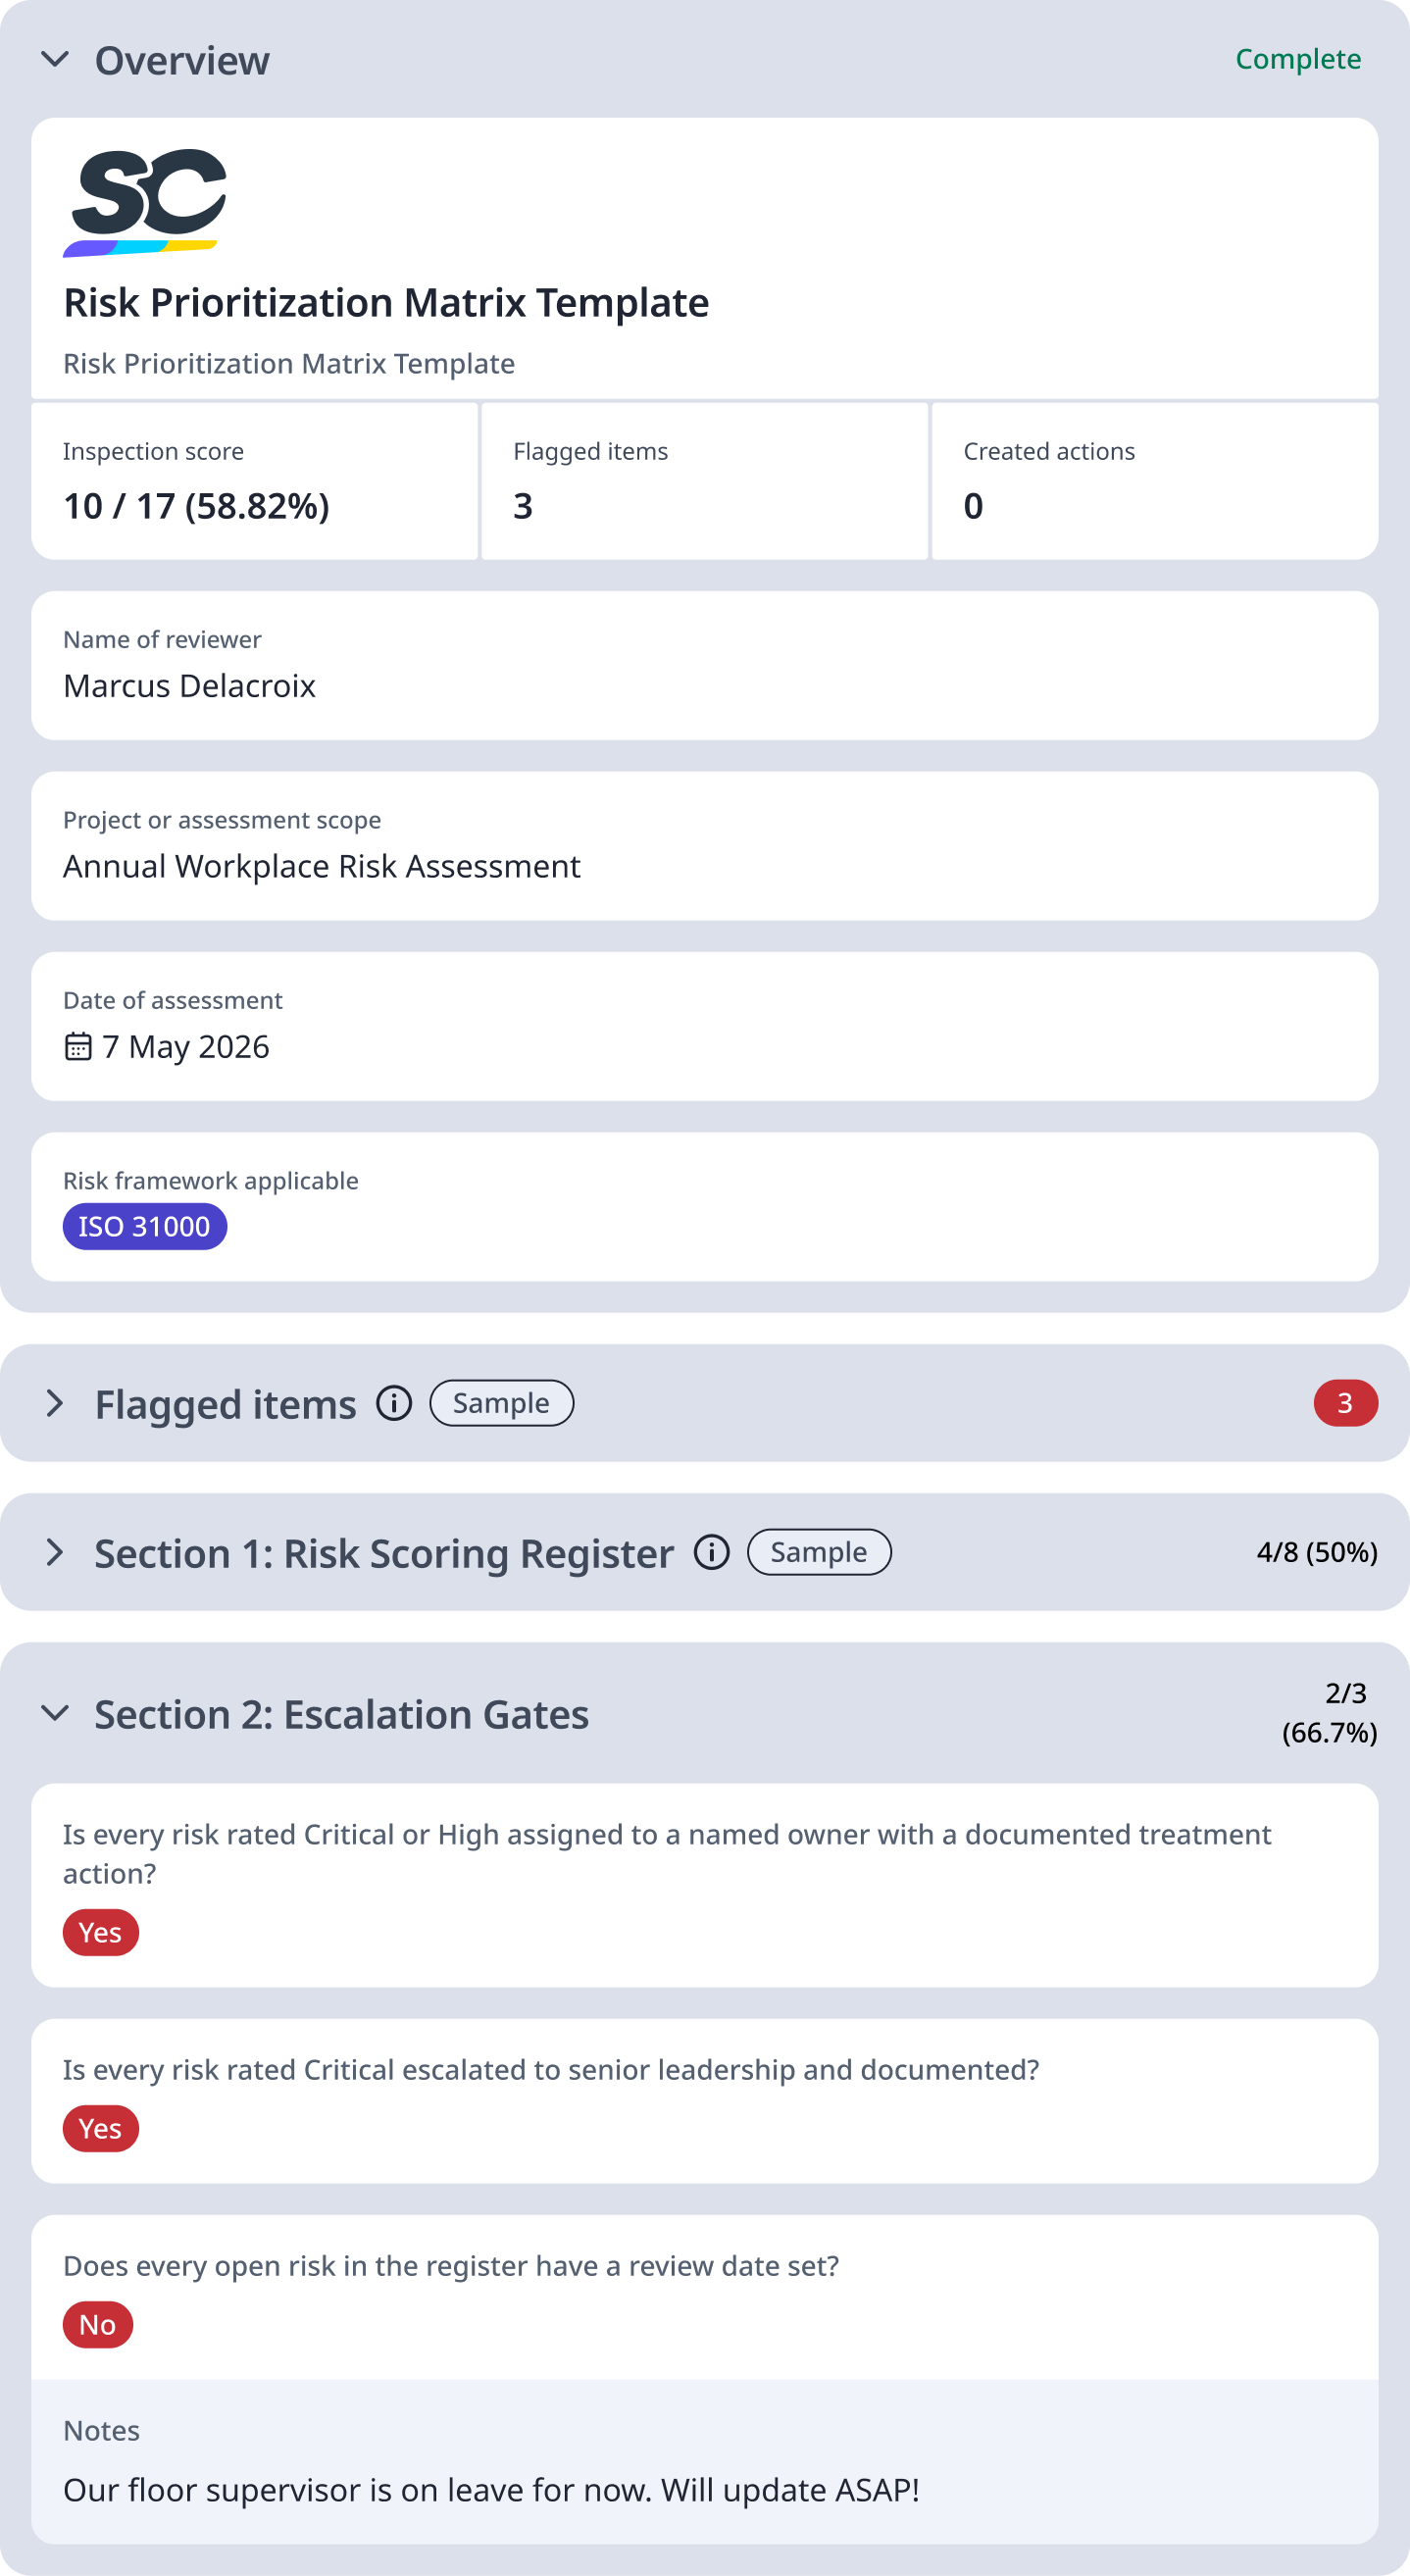
Sample Risk Prioritization Matrix Report
For reference, here is a sample of a filled-out risk prioritization matrix template:
Preview Risk Prioritization Matrix Sample Report